Sunday, July 19, 2020

Six SALMON RECIPES

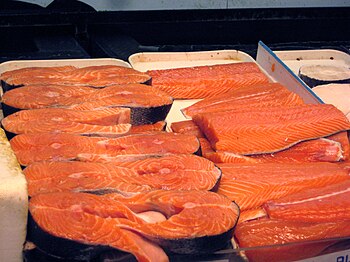
Salmon intended for consumption as food
Salmon intended for consumption as food (Photo credit: Wikipedia)
Boiled salmon.

Ingredients:- 
6 oz. of salt to each gallon of water, sufficient water to cover the fish. 

Mode:- 
Scale and clean the fish, and be particular that no blood is left inside; lay it in the fish-kettle with sufficient cold water to cover it, adding salt in the above proportion. Bring it quickly to a boil, take off all the scum, and let it simmer gently till the fish is done, which will be when the meat separates easily from the bone. Experience alone can teach the cook to fix the time for boiling fish; but it is especially to be remembered, that it should never be underdressed, as then nothing is more unwholesome. Neither let it remain in the kettle after it is sufficiently cooked, as that would render it insipid, watery, and colourless. Drain it, and if not wanted for a few minutes, keep it warm by means of warm cloths laid over it. Serve on a hot napkin, garnish with cut lemon and parsley, and send lobster or shrimp sauce, and plain melted butter to table with it. A dish of dressed cucumber usually accompanies this fish. 

Time. 8 minutes to each lb. for large thick salmon; 6 minutes for thin fish.  

Note. Cut lemon should be put on the table with this fish, and a little of the juice squeezed over it is considered by many persons a most agreeable addition. Boiled peas are also, by some connoisseurs, considered especially adapted to be served with salmon. 


Salmon and caper sauce.

Ingredients:- 
2 slices of salmon, 1/4 lb. butter, 1/2 teaspoonful of chopped parsley, 1 shallot; salt, pepper, and grated nutmeg to taste. 

Mode:- 
Lay the salmon in a baking dish, place pieces of butter over it, and add the other ingredients, rubbing a little of the seasoning into the fish; baste it frequently; when done, take it out and drain for a minute or two; lay it in a dish, pour caper sauce over it, and serve. Salmon dressed in this way, with tomato sauce, is very delicious. 

Time. About 3/4 hour.  

Collared salmon.

Ingredients:- 
A piece of salmon, say 3 lbs., a high seasoning of salt, pounded mace, and pepper; water and vinegar, 3 bay leaves. 

Mode:- 
Split the fish; scale, bone, and wash it thoroughly clean; wipe it, and rub in the seasoning inside and out; roll it up, and bind firmly; lay it in a kettle, cover it with vinegar and water (1/3 vinegar, in proportion to the water); add the bay leaves and a good seasoning of salt and whole pepper, and simmer till done. Do not remove the lid. Serve with melted butter or anchovy sauce. For preserving the collared fish, boil up the liquor in which it was cooked, and add a little more vinegar. Pour over when cold. 

Time. 3/4 hour, or rather more.      

Curried salmon.

Ingredients:- 
Any remains of boiled salmon, 3/4 pint of strong or medium stock, 1 onion, 1 tablespoonful of curry powder, 1 teaspoonful of Harvey's sauce, 1 teaspoonful of anchovy sauce, 1 oz. of butter, the juice of 1/2 lemon, cayenne and salt to taste. 

Mode:- 
Cut up the onions into small pieces, and fry them of a pale brown in the butter; add all the ingredients but the salmon, and simmer gently till the onion is tender, occasionally stirring the contents; cut the salmon into small square pieces, carefully take away all skin and bone, lay it in the stewpan, and let it gradually heat through; but do not allow it to boil long. 

Time. 3/4 hour.      

Salmon cutlets.

Cut the slices 1 inch thick, and season them with pepper and salt; butter a sheet of white paper, lay each slice on a separate piece, with their ends twisted; broil gently over a clear fire, and serve with anchovy or caper sauce. When the higher seasoning is required, add a few chopped herbs and a little spice. 

Time. 5 to 10 minutes. 


Salmon a la genevese.

Ingredients:- 
2 slices of salmon, 2 chopped shallots, a little parsley, a small bunch of herbs, 2 bay-leaves, 2 carrots, pounded mace, pepper and salt to taste, 4 tablespoonfuls of Madeira, 1/2 pint of white stock, thickening of butter and flour, 1 teaspoonful of essence of anchovies, the juice of 1 lemon, cayenne and salt to taste. 

Mode:- 
Rub the bottom of a stewpan over with butter, and put in the shallots, herbs, bay leaves, carrots, mace, and seasoning; stir them for 10 minutes over a clear fire, and add the Madeira or sherry; simmer gently for 1/2 hour, and strain through a sieve over the fish, which stew in this gravy. As soon as the fish is sufficiently cooked, take away all the liquor, except a little to keep the salmon moist, and put it into another stewpan; add the stock, thicken with butter and flour, and put in the anchovies, lemon juice, cayenne, and salt; lay the salmon on a hot dish, pour over it part of the sauce, and serve the remainder in a tureen. 

Time. 1-1/4 hour.


Sunday, July 12, 2020

Advantages Of A Petrol Powered LAWN MOWER

English: A Victa lawn mower.
A Victa lawnmower. (Photo credit: Wikipedia)
One of the more popular equipments people use for keeping up with the care of their property are petrol lawnmowers. There are several kinds of lawn mowers that people can choose from, such as an electric lawn mower or push mower. Others are powered by petrol or gasoline and for those with the most expansive lawns, there are ride-on lawnmowers.

The Problems with Electric Lawn Mowers
These come in two forms, one with a cord and one that is cordless. Corded versions might not be feasible for people with a medium or large-sized lawn because of the limited range that the cord will extend: usually around 100 to 150 feet. Some people consider electric mowers with a cord to be a hazard because of the risk of possibly running over the electric cord while the mower is running, which could put the user at risk of being electrocuted. The cordless electric lawn mower doesn't suffer from this issue. Instead, it runs on 12-volt batteries that can be recharged via a conventional household plug socket. If the keen lawn-smith goes with an electric lawnmower, a cordless one would be a serious option to consider if they were concerned by the potential hazards and limitations that come with a corded lawnmower.

Push Mowers Only for the Fit and Healthy
Push mowers are also common, requiring only man's power as the power source. By pushing the lawnmower, the blades turn as the wheels turn, cutting the grass or weeds. However, push mowers aren't as effective on overgrown weeds and dandelions because of the tall stalks and the speed of the rotating blades. Push mowers use a cylinder or reel system while other powered lawn mowers more commonly use a rotary mower with a vertical axis. A rotary mower cuts the grass shorter than a reel system with the added benefit that the grass is cut in a way that allows it to heal faster and thus, grow faster. With a push mower, the user would find himself or herself having to mow more frequently than with an electric or gasoline-powered mower which is perfect for those looking for a workout but less so for the rest of us!

Ride-on Mowers for Large Lawns
Ride-one can be fun for some people who have a bigger area to mow. Surprisingly, they carry a potential risk for the homeowners who have lawns that have some dips or others who have rolling lawns. Ride-on lawnmowers can tip over if they are on very uneven ground and can't go places where other lawnmowers might into the much tighter parts and close up to in-lawn obstacles such as shrubs and around the base of trees requiring additional work. They are, however, invaluable for cutting large areas of flatter lawn in the lowest possible time.

The Pros and Cons
Petrol power is one of the more common types of mowers. They can be noisy but are very effective and can get to places where a ride-on lawnmower or lawn tractor wouldn't be able to reach as previously discussed. If part of the lawn is downhill and the ground isn't even, that wouldn't be much trouble with a petrol lawnmower because, with the user's help, the mower can get to grass in a dip. Some powered lawn mowers come with throttle control, taking off some of the strain on the user's pushing ability. To work the throttle control on these self-propelled mowers, the user only needs to either press down on the throttle or ease up to either increase or decrease the speed of the mower and this throttle control allows the user to mow his or her lawn easily, almost like a ride-on except with more accessibility.

Owners of a petrol-powered mower also don't have to worry about running over a cord by accident and reduces the risk of other garden lovers tripping over the cord. Users with electrics that run on battery power eventually run out of power and need to be recharged which could take several hours. Imagine this: A beautiful, sunny day with a weather forecast that says the rest of the week will be rainy. It's time to mow the lawn but wait, whoever mowed the lawn last time realized the battery had run out and forgot to recharge it. Recharging a 12-volt battery takes a bit of time as opposed to just pulling the starter cord of your powered mower. If the petrol runs out, all one needs to do is make a quick trip to the fuel station to get a refill and the blades of grass can once more quiver in fear.


Just like any mower, there also are downsides to petrol-powered lawnmowers. Noise is one of those downsides, with many places, specifically in the US and parts of Europe, having a noise ordinance which means that they cannot be fired up outside specific times of the day. It also might be a disturbance to nearby neighbors who don't appreciate the noise of a petrol engine in addition to the usual mower sounds. Another potential downside to petrol-powered lawn mowers is the fuel. With petrol prices on the rise, people are trying to avoid using too much petrol and are often aiming to reduce their fuel intake. Depending on the lawn size and type of mower, the average tank may get 3 to 4 mowed lawns before needing more fuel.

Summary
Petrol lawnmowers are efficient and one of the most flexible mowers to choose from. The gardener can choose whether they want a rotary blade or a cylinder or reel blade and they won't have to worry about the distance they can go, whether extension cords might be required in order to mow the entire lawn or whether they are going to run over the trailing cable. The efficiency of time and fuel or key when looking at total cost of ownership and petrol lawnmowers can pay both of these back in spades.


Sunday, July 5, 2020

Best Meat for TACOS

Hard-shell taco with meat, cheese, lettuce, to...
Hard-shell taco with meat, cheese, lettuce, tomatoes, and onions (Photo credit: Wikipedia)
If you’re having tacos for dinner then be prepared for some great food. Most taco recipes are quite easy to make and very versatile to whatever type of food choices you make for you lifestyle. If this is your first time making tacos, learning which meats are best is a valid question. If you’ve ever been to a Mexican restaurant before you’ve probably seen all the choices in the world. Below are just a few choices you have for making great tacos. 

Beef

More than likely the most common type of meat used for tacos is beef. Ground beef is a staple for most restaurants including the popular Taco Bell. Ground beef is fairly inexpensive and only takes a few minutes to brown. Many beginners also like using this because you don’t have to worry about it becoming too tough or other texture issues you might have with other meat choices. 

Another form of beef that is used in tacos is steak. Choosing the right part of the meat is what will be most important. Most experts say to use strip steak, or other thin pieces that cook fairly quickly and also are easy to cut into smaller pieces. When cooking steak however you have to make sure that it is well done without being tough. Tough taco meat means messy eating which no one wants to deal with. 

Chicken

Another option is chicken. For those who are not lovers of red meat or simply want to try something different adding chicken is a great idea. When purchasing chicken from the store be sure to get boneless skinless chicken breast to avoid the hassle of removing bones, fat, and skin. Chicken can be shredded fairly easily and also cooks rather quickly. 

Pork

Common in Hispanic and Mexican dishes is the use of pulled pork. Adding this to your taco for a change is a great way to spice things up. However, keep in mind that pork is naturally salty and therefore you don’t want to overdo it on the seasonings. 

Seafood

Believe it or not, becoming increasingly popular is the idea to use seafood such as shrimp and fish in your tacos. Both are excellent choices and can easily transition this staple recipe into something new and exciting. When choosing the seafood you wish to use in your tacos there are some things to keep in mind. This includes remembering to avoid shrimp with shells to cut down on cooking time and to avoid fish that have scaly skin still on it or bones on the inside as this will not make for a great taco dish.


Any of these meat choices listed above would be great to improve upon your taco recipe. If you’re not sure what your guests will enjoy, you can always make a little bit of each type of meat and place it on the table and let them decide. Who knows, they may have fun mixing and matching the sort of the different meat of like a sample tray. But as long as you have a good recipe to follow, any of these meats will work great and taste even better. 


Sunday, June 28, 2020

A Waste of Packaged Gold

Harvest - Photo: Pixabay
As we drove by the plush residential homes, some recently covered with a fresh coating of paint and with the variously landscaped yards displaying their beautiful spired shrubs, flowering gardens, and well-watered green lawns, it could not be helped but to notice the evenly placed lawn bags filled to the brim with yard waste, just waiting to be carried away by the scheduled garbage pickup. So much labor must have gone into neatly and carefully packing each one of them so they wouldn't be torn open by a stiff twig or two. Each fall and spring a similar scene is reenacted by most of us who seasonally do our traditional yard cleanup. 

Having been a fairly devout organic gardener in the 1980s and traditionally would save every bit of waste clippings from our yard that would then go into a 4x4 foot by 4 feet high loosely constructed wooden bin for later processing and churning into a fine mulch, it was difficult to see virtually truckloads of "Organic Gold Plant Food" just waiting to be carted away to some landfill, or just possibly be used for fuel in some local utility supplier's furnace. It is beyond my understanding of how this "fuel" for plants can be placed on the discard list. 

With this fresh on my mind, I recollect a book written by Ruth Stout, an avid gardener, who appropriately called her book..."The No-Work Garden" which showed how she only used bales of hay in the 1950s and earlier to build her garden, spread the hay in the fall and after being well compressed through the winter, she would then simply place the vegetable seed into a small clump of soil at the proper planting time, pressed it firmly and watered to get the seed to germinate. Thereafter, her garden was never watered again. She did this year after year ...for thirty years. The soil was perfectly PH level balanced and so were all the required nutrients to sustain all the plants. Sounds like the perfect scenario, but this example is only to show what can be done with most of anyone's yard 
refuse...if properly processed.


Now, to step back to my 4-foot cube of diverse organic refuse and having filled the bin to about the 3/4 mark by eye, placing a shovelful of topsoil in between 3-4 inch layers of the material, we simply add worms, which can be purchased at a local farm store, or mail ordered through a garden supplier. Usually, they come in a few hundred in quantity and are newborns, but you can also use local worms, picked from the decayed leaf. Once placed in your compost bin and watered occasionally, they will quickly multiply and digest the organic material aerating your compost in the process. This process is carried out...automatically without energy expended on anyone's part, except for the original placement of the material and bin construction. 

After 3 or 4 weeks, given proper rainfall and a little watering, your "pot of gold" should be ready to use. Then, simply place a handful of this composted material in a small hole 6 inches deep, for pre-started tomato plants several inches tall, where you plan to plant your vegetable garden. Pack some of this compost mixed with some topsoil around the sides and also dress around the top of each plant. Given the proper rain, sunshine, and warmth, your tomatoes will give you a very early harvest, mainly because you did not discard the "hidden gold".


Sunday, June 21, 2020

A Few CAKE DECORATING Ideas

English: A chocolate cake decorated with icing...
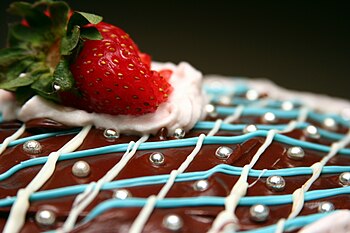
A chocolate cake decorated with icing, strawberries, and silvery sugar beads.
(Photo credit: 
Wikipedia)
Did you know that the first cakes baked in America where small loaves of sweet bread? Look how far we have come. Home bakers should not be intimidated by the elaborate cakes being made today. You do not need to be a pastry chef to make beautiful cakes, you just need the know-how and practice. Of course, the right tools will go a long way in your cake decorating endeavors. Here are a few ideas you might like to try.

Every cake worth merit starts with a smooth icing. The cake needs to cool completely before they are iced and decorated. To keep crumbs from ending up in your icing and ruining the look of your cake, start with a thin base coat of frosting that is not quite as stiff as the regular layer will be. Once this coat is on, set the cake in the refrigerator for 20 minutes. This will set the icing and any crumbs will be caught in this first layer. Now you can spread a regular layer of icing without worrying about crumbs.

Use an icing spatula to apply and smooth the second coat of icing. Once the icing is on the cake, start smoothing on the sides by running the spatula around the perimeter of the cake. One trick for smoothing the frosting is to dip the metal icing spatula in cold water, this will aid in smoothing the frosting. To smooth the top, dip the spatula in cold water and holding it horizontally over the top of the cake. Start at the point farthest from you, holding the spatula in both hands, skim the top of the icing by bringing the spatula straight toward you.

Simple Designs

Some cake decorators say learning to smooth the icing is the hardest part of cake decorating. Practice will make you a pro in not time. Once you have it down, show it off, even a cake without many decorations that is clean and smooth will make a perfectly elegant offering.

Instead of icing, cake tops can be dusted with powdered sugar. You can choose to use a stencil for a more decorated appearance, or just the powdered sugar for a clean look.

Edible decorations are a beautiful yet simple cake decorating technique. The use of sprinkles, candy, nuts, and coconut pressed into the icing before it sets, will make your cake stand out.

To apply a textured look for your cake decorating, use a small cardboard comb, available in baking supply stores. 

Piping is achieved by using a pastry bag fitted with a metal tip that is held on by a coupler. This is your most important tool for cake decorating. You can make lines, words, shells, flowers, and many other designs on the top or sides of the cake. Fill the bag with no more than 1 cup of icing at a time, twist the top of the bag and keep steady pressure when piping the design. Use your other hand to guide the tip. It is wise to find out everything you can about piping before you begin.


Fondant a smooth white paste, is used in complicated cake decorating. Fondant is kneaded and rolled to cover cakes with a sleek smooth layer of icing. It is also used to make designs that are 3-D. It is less tasty than buttercream, but the cake will look sleek and elegant.


Sunday, June 14, 2020

Why Begin with WILD FLOWER Seeds


With so many sources for live plants In the market these days, you might start wondering why some people would even bother growing his plant from a seed. This has got its own point but nothing still beats the satisfaction in growing something from its basic form- in this case, a plant from a single seed.

Self-satisfaction is one main reason why people still opt for wildflower seeds while there are so literally hundreds of other easier ways to put up a wildflower garden. The wildflowers from mail orders and garden centers are really great but these would never duplicate the satisfaction of the gardener if he knows that he accomplished one of the most vital happenings in the world- the growth of a plant.

Another reason is the money value. Seeds are far cheaper since there is not much investment on the part of the seller. Aside from this, the cost of shipping, storage, and handling costs and other extra payments will be eliminated since a) seeds require minimum space for strange and handling and b) wildflower plants are more difficult to transport due to bulk and care that must be dedicated for each plant.

The third reason why there is wisdom in buying wildflower seeds than choosing to more mature wildflower plants is the variety of choices. The diversity of wildflower plants in gardening centers could never equal the variety that could be offered if they were stacked in small packages.

So, if you are thinking of growing your own little garden of wildflowers, you might consider investing in wildflower seeds than live plants.

If you would give it a try, then you should know some of the basic knowledge in growing wildflower seeds. Fractions of this are the following:

Check for instructions- Before you begin with experimenting with your wildflower seeds, it is best that you check the instructions that come in the packages. This way, you will better identify which wildflower seeds must be soaked in water first, or which should be frozen first or which should undergo other sorts of treatments before beginning to scatter them in the soil. Also, carefully following the seller's instructions would also serve as your easiest way out of potential risks.

Gather all the materials needed- If the carpenters have their hammer, screwdriver, and stuffs that they would build things with, gardeners also need to have some specialized items that would help you grow your wildflower seeds into lovely flowers and plants. These include seed pots and trays, seed tray covers, potting compost, and other more common gardening tools.


Know the process by which your wildflower seeds would spring into its lovelier and more attractive forms- Like all living things in this sphere, wildflower seeds also have their lifecycle that has some basic succession like all other plants and some more species-specific processes that they undergo. To effectively grow wildflower seeds into their best shape, you have to know these processes and understand the principle behind.

If you are an experienced gardener, this really is no big deal for you as you have already seen the life that these creatures possess. But if wildflower seeds are your trial stage, you might want to do some researches to help spare you from beginner's failures.


Sunday, June 7, 2020

Barbeque and Grilling Blunders - Learn to Eliminate Outdoor Cooking Mistakes that Kill Your Cookout

BBQ Barbeque - Picture: Pixabay
Your average backyard cook is no expert in the barbeque or grilling field. He has no television shows on the Food Network. He has no grilling cookbooks out. Nor has any of those been part of his lifetime goal.

No, your average outdoor cooking enthusiast makes more mistakes with bbq grilling than you could ever imagine. The meat ends up dry and tough time after time, despite marinating for hours. Or the meat is burnt or cooked too long

These mistakes are made time and time again because your average backyard cook usually does not know any different. He does not automatically know How to Barbeque.

Here are some of the more common mistakes and do's and don'ts made in bbq grill cooking:


  1.  If you started with frozen meat, make sure the meat is thawed completely. Trying to cook the inside of a still-frozen piece of meat is next to impossible without burning the outside.
  2. When using a charcoal grill, try to start the fire without charcoal lighter fluid. The lighter fluid taste will always get into your meat no matter how much you cook the coals down first. A chimney starter makes starting the fire a breeze. It also allows you to add charcoal along the way should the coals burn out along the way.
  3. Never poke the bbq meat with a fork after cooking has begun. This is one of the most common mistakes and one of the most deadly for your barbeque. When poking with a fork, the juices will run out of the meat and right into the bottom of the barbeque pit or grill. Your meat will be dry and less tender. Use a long set of tongs to turn the meat.
  4. Lower the heat. Except for grilled steaks, which need a quick searing, cook slowly over low to medium heat. Lower heat is much more manageable and it will make the meat tender and juicy.
  5. Quit lifting the lid to check the meat. Every time you do that it changes the temperature inside the bbq grill or pit. Air from you opening the lid acts like a sponge and dries the meat up. Opening the lid also increases your chances of flare-ups.
  6. This is more of a food safety mistake. Do not put the cooked meat back on the same plate or platter that the raw meat was on without washing it first. Mixing the cooked with the raw just begs for someone to get sick.
  7. After removing the meat from the bbq grill or pit, let it rest for at about 5-10 minutes. Cutting into or slicing the meat immediately after pulling it from the cooker will cause all the juices to flow out of the meat and onto the platter.


Of course, these are not all of the mistakes made by the amateur outdoor cook but are some of the more common. But if you will prevent doing these yourself, you will eliminate many of the things that cause barbeque failures.

Your guests and family will wonder how come your grilled or barbequed food is so much better then it used to be. And, who knows?... Maybe the Food Network will come looking for you.