Sunday, November 1, 2020

What Frosting To Use In Your CAKE DECORATING

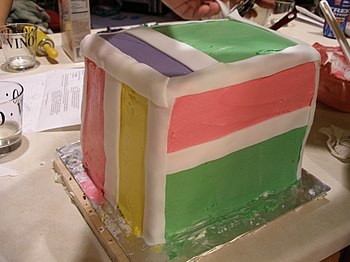
English: Birthday cake with hard white fondant...
Birthday cake with hard white fondant icing as trim, framing soft, colored buttercream frosting.
(Photo credit: 
Wikipedia)

Those of us who are into cake decorating, think of the beautiful icing designs when we think of cake. Icing is the finishing touch on cakes, cookies, and cupcakes. There are several different types of icing used in cake decorating. The choice of icing while cake decorating, will have a great deal to do with how the decorated cake will look. 

1. Buttercream Icing: Buttercream is the icing that is used the most in cake decorating. This is the same type of frosting that we can buy readymade in the grocery store. This icing is easy to use and easy to make. The ingredients are confectioners sugar, and butter or shortening. What you use to thin the frosting will differ with the icing texture you need to work with, to determine whether to use eggs or milk. Take care when thinning the frosting, remember, a little milk goes a long way. If you find the frosting is too thin, you can add a bit of confectioners sugar to thicken it.
To assure an even finish on your frosting, dip the icing spatula in cold water to make the surface smooth. This will give a smoother finish for writing. Buttercream is used to create flowers and other decorations made with a pastry bag. The icing needs to be the right consistency to make flower petals or writing. When you make roses out of icing, you can freeze them and add them to the cake later. This will make it easier to handle.

Buttercream can be stored in the refrigerator without getting hard. Make sure it is back to room temperature before you attempt to use it.

2. Foam Icing: This is a meringue and is used on a lemon pie or Baked Alaska. This frosting is made of egg whites beaten into stiff peaks. It is possible to add flavoring and color to the meringue. You will not be able to use this icing for intricate cake decorating, and you won't be able to use an icing bag with this icing. This icing is used when you want the cake to look fluffy, with little ornate decoration.

3. Fondant: This icing is very popular with those who decorate wedding cakes, and cakes for very special occasions. The ingredients are simply powdered sugar, water, cream of tartar, or glucose. Fondant is thick and doughy, with a silky, smooth, texture. Fondant will give the cake a flawless surface, and soft, rounded edges. Working with fondant is an art and will take practice to get it right. Fondant has a translucent quality and will work best when placed on the cake over a thin layer of buttercream frosting.

4. Fudge Icing: Fudge icing is made from chocolate, peanut butter, almond, or mint. This icing is quite thick and contains both shortening and butter.

5. Glazes: This frosting is thin and watery, and will harden into a shell after it is placed on the cake. This frosting is mostly used on pastries. Glazes help to keep the pastry moist. 

6. Flat Icing: This icing is similar to a glaze, but it is a bit thicker. Flat icing is a combination of confectioner's sugar and water and is used to drizzle onto pastries.

7. Royal Icing: This is also a flat icing, and hardens after it is set. Royal icing is a wonderful choice to make flowers, sculptures, and garnishes for cake decorating.


You can use any combination of the basic seven icings listed, to create a personal masterpiece. You will need to practice before you become good at cake decorating. You will get the hang of it sooner than you think, and even the mistakes will taste great.


Sunday, October 25, 2020

ZUCCHINI: A Power House of Nutrition

English: Young zucchini
Young zucchini
(Photo credit: 
Wikipedia)
Dating back to 7000 B. C., zucchini (Cucurbita pepo) is native to Central and South America.  Sometimes called by the nickname “Italian Squash,” zucchini was brought to North America by its southern neighbours.  Early European explorers introduced zucchini to Italy and other countries in Europe.  Italians initially grew zucchini for their sweet, edible blossoms, later the hearty fruits were experimented with producing the delectable dishes that resulted in zucchini being dubbed Italian squash.  Up until the 20th Century, most Americans considered zucchini a treat reserved for eating on special occasions and were store-bought instead of grown in gardens. 

Part of the summer squash family, zucchini is an excellent source of manganese and vitamin C, a very good source of magnesium, vitamin A, potassium, calcium, iron, folate, copper, riboflavin, niacin, and phosphorous.  Many of the nutrients have been shown to be helpful for the prevention of atherosclerosis and diabetic heart disease.  Summer squash’s magnesium has been shown to be helpful for reducing the risk of heart attack and stroke.  Together with the potassium in summer squash, magnesium is also helpful for reducing high blood pressure.  All summer squash are perfect diet foods - low in calories, sodium, fat-free, and provide a source of fibre.  All parts of the zucchini are edible.  

How To Grow

Zucchini is probably the best known of the summer squashes.  It is a type of narrow squash that resembles a cucumber in size and shape.  It has a smooth, thin skin that is either yellow or green in colour and can be striped or speckled.  Its tender flesh is creamy white in colour and features numerous seeds.  Its edible flowers are often used in French and Italian cooking.  

Zucchini can be planted by direct seeding or by transplanting young plants that have been started indoors.  Seed directly into the ground as soon as the soil reaches temperatures of 60°F/16°C. for vines.  Fill the holes with compost and mound slightly.  Plant seeds 1in/2.5cm deep.  

Zucchini is a member of the Cucurbitaceae family that includes cucumbers, melons, gourds, and squash, all particularly sensitive to frost.  Select a sheltered spot, and prepare holes about 12in/30cm in diameter and 12in/30cm deep.  Measuring from the centre, space the holes 36in/90cm apart for bush types, 6ft/1.8m apart for vines.  To conserve space, squash can be trained over a sturdy trellis, in which case 2ft/60cm between plants is enough.  

Zucchini grows best when exposed to 6-8 hours of direct sunlight each day.  Regular watering is essential for summer squash.  Feed the plants with a high-potassium organic liquid feed to produce a higher yield.  Thick mulch added after planting will preserve moisture and keep the fruits from touching the ground where they will become soiled and be exposed to insects and diseases.  

Harvesting 

The flavour of zucchini is best when it is less than six inches long.  They should be firm, but not hard.  Zucchini are prolific producers and regular harvesting will promote continued yield throughout the growing season.  Harvest by cutting the stems from the plants gently with a paring knife.  As they are composed mainly of water, summer squashes dehydrate rapidly.  Harvest just before cooking and keep in the refrigerator in a perforated plastic bag until cooking.  Don’t forget that squash blossoms are delicious to eat.  

Small summer squashes are used skin and all.  Larger squash needs their skin and seeds removed: slice lengthwise and scoop out the seeds with a spoon.  Wash summer squash under cool running water and then cut off both ends.  You can then proceed to cut it into the desired size and shape for the particular recipe.  


In the kitchen, zucchini can be steamed, sautéed, boiled, baked, fried, grilled, and stuffed.  Some ideas include: serve raw as an appetiser with a vegetable dip or salad dressing, grate and sauté with thinly sliced garlic, add to bread, muffins, cakes, stews, casseroles, soups, sprinkle grated zucchini or other summer squash on salads or sandwiches.  It can be preserved by canning, freezing, and drying.

In the garden, some gardeners let the squashes ramble through the corn patch, where their sandpapery leaves deter raccoons.  Good companion plants for zucchini are corn, marjoram, and nasturtium.   Don’t grow zucchini and Irish potatoes together as they are incompatible.


Sunday, October 18, 2020

All About PEPPERS

Assorted bell pepper fruits from Mexico
Assorted bell pepper fruits from Mexico (Photo credit: Wikipedia)

Where did peppers come from?

One of the most common genera of peppers, known as the capsicum, is thought to have been in existence millions of years ago in present-day Bolivia, according to the Chicago Botanic Garden's Information and Resources. But, the first known cultivation of peppers happened in Mexico and Central, as well as South America 10,000 years ago. The probable spread of these crops from Bolivia to these areas is attributed to birds. The capsicums existed mainly in the Americas until about 1600. Christopher Columbus' voyages were helpful in spreading capsicum peppers throughout the world.

The original peppers were tiny and round, unlike most of today's peppers which are long and larger.


What can I do with peppers?

Most commonly, peppers have been used to spice up generally boring foods like rice or corn. Through the years though, people have come up with a whole slew of uses for peppers from making pepper jelly, to using ornamental peppers for garlands. Here's a list of the most interesting as well as some of the more common uses for peppers:

Pickled Peppers
Pepper Jelly - Dried Apricot Jalapeno Jelly
Roasted Peppers
Adding Peppers to pasta dishes
Hot Sauce
Pepper Garlands/Decorations
Using peppers in the stirfry
Pepper vinegar
Pepper spray (animal deterrent for plants)

What different types of peppers are there?

There all sorts of classifications for peppers. There is the scientific classification method that uses the genus and species name: The most commonly known and cultivated genus of peppers is the capsicum, whereas the five most common species of peppers (all within the capsicum category) include: chinense, frutescens, pubescent, annum, and baccatum. All of these types of peppers are also labelled chillies.

There is the usage method which categories various peppers into hot, sweet, or ornamental. And then, there is the location-classified method that is what gives some peppers its actual name.

Here's a basic list of some of the varieties of the mentioned species of peppers you might see in your local grocery stores:

Bell pepper
Anaheim pepper
Fresno
Poblano
Habanero
Cubanelle
Chipotle
Jalapeno
Serrano
Mariachi

Aside from the different coloured bell peppers used in stirfry, many of these other peppers are considered hot peppers.

How can you tell how hot a pepper is?

The range of spiciness for peppers is measured in Scoville units. Wilbur Scoville developed a scale to help determine this very issue and measure pepper pungency in 1912. The higher the number of Scoville units, the hotter the pepper. Here's a basic Scoville Scale. that shows habaneros trumping chipotles and jalapenos as the most commonly known hottest pepper.

Health Effects

Regular pepper consumption is thought to have both good and bad effects on one's health. One of the clearest effects of eating peppers is what it does for congestion. Eating peppers, especially those hot ones, will help clear up your nasal passages in no times (as will most spicy foods!)

According to a University study, consuming peppers regularly can help the body control its amount of insulin, which would be very beneficial for diabetics. Other studies show though that pepper digestion can increase the risks of stomach cancer, the definite answer remains unclear. Research has also been linking peppers to helping stop the spread of prostate cancer in some men.


Pepper Recipes (see Recipe4Living.com for the following:)
Pepper Sauce
Basic Salsa
Salsa Cruda
Crowd-Pleasing Chili
Roast Beef and Red Pepper Sandwiches
Impossibly Easy Roasted Red Peppers and Feta Cheese Pie
Tangy Lemon Pepper Shrimp
Stuffed Peppers
Pepper Herb Grilling Rub

Sources:
Chicago Botanic Gardens
The Scoville Scale


Saturday, October 17, 2020

The Pros and Cons of Going HYDROPONIC

English: Rix Dobbs' home-made nutrient film te...
Rix Dobbs' home-made nutrient film
technique hydroponics system
  (Photo credit: Wikipedia)
Hydroponics is a Latin term, which literally means “working water.” What it means to horticulture is the growing of plants without soil. Hydroponic gardening is an exciting field that offers solutions to several problems faced in the world of food production. For impoverished people who live in terrain or climate inhospitable to agriculture, hydroponics offers a means of growing food. In areas where food is traditionally produced, but where fields are overcrowded or stripped of their nutrients, hydroponics is a way food can be produced using a minimum of space and resources.

Hydroponic growth leads to an increase in production over traditional farming in two ways. For one, hydroponic gardening just plain saves space. Plants can be placed much more closely together than in traditional fields; as many as four times as many plants can be grown in the space using hydroponic techniques as opposed to traditional methods. Secondly, hydroponics eliminates many of the problems associated with traditional farming that leads to sickly, damaged, or wasted crops.

Because hydroponic growers produce their own nutrients mixes, it takes the guesswork out of figuring out which plants will grow best in a field and what nutrients need to be added to the soil. The nutrient mixture is the right one for the plant, in the right ratios, every time. The fear of soil-based diseases is eliminated, because, of course, there is no soil. These two factors come together to make hydroponics an extremely efficient method of food production.

Hydroponics is also environmentally sound. The water consumption in hydroponic growing is significantly less than traditional growth methods; in many cases, hydroponic crops use a tenth of the water of equivalent traditional crops. Also, the water that is used is used more effectively; in hydroponics, weeds do not steal part of the crop’s water supply. 

The benefits are not without their costs, however. The environmental good that hydroponics produces with its decreased water consumption is somewhat negated by the amount of energy needed to support hydroponic growing. Much hydroponic growing happens in greenhouses, where significant amounts of electricity are used trying to give the hydroponic plants all the light they need.

The electricity consumption is environmentally damaging and expensive, and expense is another area where hydroponics comes under the gun. The nutrient mixtures and growing mediums used can be very expensive. While research is happening to try and bring the costs down, and there are some promising leads, like the field of aquaponics, hydroponics is currently financially prohibitive for some.

There is a common misconception that hydroponics produces organic food. While it is possible to grow organic food through hydroponics, this is the exception and not the rule. Most growers used pesticides on their hydroponic crops. Though the pesticides used in hydroponics do not run-off and pollute the surrounding environment like the pesticides used in traditional fields, they are still on the plants themselves. 


The field of hydroponics is filled with promise, and much research is being devoted to solving the concerns that currently stop more farmers from going hydroponic. Until these problems are solved, however, farmers and amateur gardeners alike will need to carefully weigh the pros and cons of hydroponics before making the leap to that style of growing.


Sunday, October 11, 2020

Making Spanish PAELLA The Easy Way

English: paella Español: paella
Paella Español: paella (Photo credit: Wikipedia)

Paella is a saffron-flavored dish made with varying combinations of rice, vegetables, meat, chicken, and seafood. Spain and the Catalan languages, paella means frying pan or pot. The traditional paella pan is flat and of large diameter, it can also have handles on each side.

In fact, paella is one of the most versatile dishes to make. Paella also has the advantage of being great to clean out the fridge and use up leftover meats and vegetables. Any combination will eventually be great the secret is in the chemistry. Spanish Paella is a dish that is generally made to feed several people. Moreover, Spanish Paella is quite flavorful the next day as the tastes have had time to mix together and become stronger.

Here are three basic steps to follow to make wonderful Spanish Paellas while leaving you the latitude to be creative and to make the dish their own by customizing it to their taste.

1. Preparing the rice.

Select a type of rice that you are comfortable using. Feel free to experiment but know that Spanish Paella contains a lot of ingredients and if you are unhappy with the end result with a particular type of rice, you might end up with a lot of waste. Basmati, brown, or a mix with wild rice can add great taste and texture. Follow the instructions on the package with regards to washing and cooking the rice. Finely chop some onion, garlic, and tomato. Heat a saucepan and add olive oil once the saucepan is hot (make sure that the oil does not start smoking. Burnt olive oil is carcinogenic and quite unhealthy). Once the oil is hot, throw in the uncooked rice. Frying uncooked rice gives it a nutty taste. Let the rice fry in the saucepan for a minute or so. Add the chopped onion, garlic, and tomato until they soften, mixing constantly. Spice with saffron, salt, and pepper. Feel free to experiment. Cumin, Cayenne various fine herbs, or even a bit cinnamon or cloves can easily be added for a flavoring of your own. This mixture should not be on the stove for more than three to five minutes. At high heat with constant mixing, none of the ingredients should stick but they should mix well together and soften. Once all the ingredients are combined, remove the saucepan from the burner and mix in some frozen peas. Add enough peas to make a well-balanced mixture.

2. Choosing and making meat.

In a frying pan at high heat, brown some pieces of chicken. Upper thighs, drumsticks, breasts...it's all good. Do not cook the meat completely but brown the outside. Once browned, set the meat aside. Lamb can also add great flavor to your Spanish Paella.


3. Combination of it all

Cover the bottom of the Spanish Paella pan with the uncooked rice mixture. Add the browned chicken pieces on top. Add uncooked shellfish and small fish filets rolled up and fastened with a toothpick or string. Use any type of fish but make sure that its flesh will hold well together. Pour some chicken broth on top (if the broth is warm the cooking time will reduce). Note that you can also add wine for more flavor. Cover the Spanish Paella dish and cook for about 45 minutes at 350 Fahrenheit or until the rice is fully cooked. At this point, you can add raw shrimp or muscles and cook uncovered for another five minutes.

In short, the secret to preparing the perfect Spanish Paella is to make it your own!


Saturday, October 3, 2020

Create An Inspiring WINE BOTTLE Garden Fountain

(CC) PxHere

Have you ever known anyone that collects wine bottles? While there are many beautifully shaped and colorful wine bottles, there does not seem to be many uses for them once the alcohol is consumed. People have been known to use the wine bottles as candle holders; the candle wax melting down the sides of the bottles makes for a very unique indoor decoration. Often people just collect the bottles and add them to their shelves. In this case, the bottles are more like dust collectors.

One great idea for empty wine bottles is to use them to create an outdoor garden fountain. Not only will you be creating an uplifting and almost spiritual design, but also you will be helping Mother Earth by recycling what otherwise would be a dumpster contribution.


The Basics

In order to create a wine bottle garden fountain, you must first decide on where you want to dig the hole that will accommodate a minimum of 18 bottles, a spray fountainhead, a water pump, a sump, rocks, bricks, and some pavers. All of your materials are going to be submerged.

The wine bottles will be turned upside down so that the bottoms are at the top. You want to find traditional wine bottles in a variety of colors, as their bottoms are concave. The dipped bottoms catch the water as it sprays from the fountainhead and creates magical, tiny, colorful pools. The reflection from the tiny pools that this creates in the sunlight is spectacular and inspiring.

Your water fountain will be circular as the bottles dictate an automatic circle design when put together. Start with a six-bottle core and then each ring after that will double your need for wine bottles (i.e.: six for the core, 12 for the second ring and if you desire a larger garden fountain you will need 24 bottles for the third ring). The first six bottles will be strapped around the rainwater pipe held together with waterproof tape. Be careful when handling the bottles, as the sheer weight of them will make them difficult to carry. Use goggles or protective eyewear when working with glass. For other water fountain ideas and inspirations go to http://www.garden-fountains.com/fountain-selection-guide-visual.html.

Basically, you want to cover the hole with plastic sheeting to ensure proper drainage. You will then fill the plastic-lined hole with bricks to hold the bottles in place, the submersible water pump, armored piping to channel the wiring under the lawn or pavers and small cobblestones and gravel to arrange around the bottles, serving as more support. The spray nozzle fountainhead will obviously rise above in the center. After you arrange some larger, decorative rocks atop the fountain to hide all the hardware, you will finally add the pavers to hold everything in place and hide the plastic sheeting.

You will want to consult with a home and garden center expert if you have any questions about the specifics on setting up your wine bottle garden fountain. You may also do some research online for specific instructions as well as thumb through any fountain project literature.

Delightful Sight

Indeed, the combination of colorful wine bottles, decorative, smooth, river rock and cement pavers is a magical sight. Wine bottle garden water fountains lend themselves well to many different themed gardens. It is a definitely conversational piece as you can talk about how you were able to collect each wine bottle and how you are proud of your recycling efforts. Wine bottle spray water fountains are beautiful and eco-friendly.


Sunday, September 13, 2020

Grilling TUNA STEAKS For A Simple GOURMET MEAL


Tuna steak served in a French bistro
Tuna steak served in a French bistro (Photo credit: Wikipedia) 

Looking for a delicious and simple way to grill up that fresh tuna steak that you just caught or bought from the local seafood market? 

Grilled tuna steak  is a delightful and exciting entree for any special meal. There are various methods to spice up and flavor your catch, but today we want to talk about a popular method using wasabi powder. This unique spice is being used by many top chefs to add a special flare and flavoring to the tuna.

Assemble the following recipe ingredients:

• tuna steaks, cut to a thickness of 3/4 inch to 1 1/2 inch each ( your preference )
• 4 to 6 ounces of butter
• 1 cup of teriyaki marinade
• 1 tablespoon of wasabi powder
• 2 chopped green onions
• 1 tablespoon of olive oil, peanut oil, or vegetable oil
• salt and pepper to taste

Get started by marinating the tuna in the teriyaki marinade. Place the tuna into the marinade and completely coat both sides of the meat. Cover, place into the refrigerator and let the tuna sit and marinate for an hour or more, overnight is good too.

When ready, start up your grill and get it good and hot, but not too hot. Ideally, bring it to the same temperature as if you were grilling a regular beef steak on the grill. Then mix the wasabi powder, butter, and the green onions together and place it aside for the time being. Once the grill is to the ideal temperature and you are ready, then brush the oil onto the tuna steaks and season the meat with salt and pepper to taste. While grilling, periodically baste the tuna with the leftover teriyaki marinade. This will help to keep the tuna moist and add additional flavor. Cook until they are done to your desired temperature, then serve with the butter. You can also let some butter melt on the tuna fillets as they are cooking as well.

An alternative set of recipe ingredients and marinade flavoring:

• tuna steaks, 1-inch thick
• Sesame oil
• 1 rounded tsp. cornstarch
• 1/3 c. rice vinegar
• 1/3 c. mirin
• 1/3 c. soy sauce
• 3 tbsp. minced crystallized ginger

Popular tuna species:

Tuna is a popular, delicious, and rich tasting seafood that is prepared in many ways. It is perfect for grilling, sautee, and broiling. The flesh of tuna is pink because the tuna's muscle tissue has a higher oxygen capacity than other fish species.

• Bluefin: An important source of seafood, providing much of the tuna used in sushi. It is a particular delicacy in Japan where it has been reported that the price of a single giant tuna can exceed $100,000 on the Tokyo fish market.

• Yellowfin: found in open waters of tropical and subtropical seas worldwide, though not in the Mediterranean Sea. It has been reported to be up to 94 inches in length and 440 lb in weight. The second dorsal fin and the anal fin are both bright yellow, thus the common name, and they are very long, as are the pectoral fins. The main body is very dark metallic blue, changing to silver on the belly.

• Albacore: found in the open waters of all tropical and temperate oceans, and the Mediterranean Sea. It is a prized food and a significant fishery. Methods of fishing include rod and reel, long-line fishing, and purse seining and are highly sought after by sport fishers and recreational fishermen.

• Bigeye
• Blackfin