Sunday, October 11, 2020

Making Spanish PAELLA The Easy Way

English: paella Español: paella
Paella Español: paella (Photo credit: Wikipedia)

Paella is a saffron-flavored dish made with varying combinations of rice, vegetables, meat, chicken, and seafood. Spain and the Catalan languages, paella means frying pan or pot. The traditional paella pan is flat and of large diameter, it can also have handles on each side.

In fact, paella is one of the most versatile dishes to make. Paella also has the advantage of being great to clean out the fridge and use up leftover meats and vegetables. Any combination will eventually be great the secret is in the chemistry. Spanish Paella is a dish that is generally made to feed several people. Moreover, Spanish Paella is quite flavorful the next day as the tastes have had time to mix together and become stronger.

Here are three basic steps to follow to make wonderful Spanish Paellas while leaving you the latitude to be creative and to make the dish their own by customizing it to their taste.

1. Preparing the rice.

Select a type of rice that you are comfortable using. Feel free to experiment but know that Spanish Paella contains a lot of ingredients and if you are unhappy with the end result with a particular type of rice, you might end up with a lot of waste. Basmati, brown, or a mix with wild rice can add great taste and texture. Follow the instructions on the package with regards to washing and cooking the rice. Finely chop some onion, garlic, and tomato. Heat a saucepan and add olive oil once the saucepan is hot (make sure that the oil does not start smoking. Burnt olive oil is carcinogenic and quite unhealthy). Once the oil is hot, throw in the uncooked rice. Frying uncooked rice gives it a nutty taste. Let the rice fry in the saucepan for a minute or so. Add the chopped onion, garlic, and tomato until they soften, mixing constantly. Spice with saffron, salt, and pepper. Feel free to experiment. Cumin, Cayenne various fine herbs, or even a bit cinnamon or cloves can easily be added for a flavoring of your own. This mixture should not be on the stove for more than three to five minutes. At high heat with constant mixing, none of the ingredients should stick but they should mix well together and soften. Once all the ingredients are combined, remove the saucepan from the burner and mix in some frozen peas. Add enough peas to make a well-balanced mixture.

2. Choosing and making meat.

In a frying pan at high heat, brown some pieces of chicken. Upper thighs, drumsticks, breasts...it's all good. Do not cook the meat completely but brown the outside. Once browned, set the meat aside. Lamb can also add great flavor to your Spanish Paella.


3. Combination of it all

Cover the bottom of the Spanish Paella pan with the uncooked rice mixture. Add the browned chicken pieces on top. Add uncooked shellfish and small fish filets rolled up and fastened with a toothpick or string. Use any type of fish but make sure that its flesh will hold well together. Pour some chicken broth on top (if the broth is warm the cooking time will reduce). Note that you can also add wine for more flavor. Cover the Spanish Paella dish and cook for about 45 minutes at 350 Fahrenheit or until the rice is fully cooked. At this point, you can add raw shrimp or muscles and cook uncovered for another five minutes.

In short, the secret to preparing the perfect Spanish Paella is to make it your own!


Saturday, October 3, 2020

Create An Inspiring WINE BOTTLE Garden Fountain

(CC) PxHere

Have you ever known anyone that collects wine bottles? While there are many beautifully shaped and colorful wine bottles, there does not seem to be many uses for them once the alcohol is consumed. People have been known to use the wine bottles as candle holders; the candle wax melting down the sides of the bottles makes for a very unique indoor decoration. Often people just collect the bottles and add them to their shelves. In this case, the bottles are more like dust collectors.

One great idea for empty wine bottles is to use them to create an outdoor garden fountain. Not only will you be creating an uplifting and almost spiritual design, but also you will be helping Mother Earth by recycling what otherwise would be a dumpster contribution.


The Basics

In order to create a wine bottle garden fountain, you must first decide on where you want to dig the hole that will accommodate a minimum of 18 bottles, a spray fountainhead, a water pump, a sump, rocks, bricks, and some pavers. All of your materials are going to be submerged.

The wine bottles will be turned upside down so that the bottoms are at the top. You want to find traditional wine bottles in a variety of colors, as their bottoms are concave. The dipped bottoms catch the water as it sprays from the fountainhead and creates magical, tiny, colorful pools. The reflection from the tiny pools that this creates in the sunlight is spectacular and inspiring.

Your water fountain will be circular as the bottles dictate an automatic circle design when put together. Start with a six-bottle core and then each ring after that will double your need for wine bottles (i.e.: six for the core, 12 for the second ring and if you desire a larger garden fountain you will need 24 bottles for the third ring). The first six bottles will be strapped around the rainwater pipe held together with waterproof tape. Be careful when handling the bottles, as the sheer weight of them will make them difficult to carry. Use goggles or protective eyewear when working with glass. For other water fountain ideas and inspirations go to http://www.garden-fountains.com/fountain-selection-guide-visual.html.

Basically, you want to cover the hole with plastic sheeting to ensure proper drainage. You will then fill the plastic-lined hole with bricks to hold the bottles in place, the submersible water pump, armored piping to channel the wiring under the lawn or pavers and small cobblestones and gravel to arrange around the bottles, serving as more support. The spray nozzle fountainhead will obviously rise above in the center. After you arrange some larger, decorative rocks atop the fountain to hide all the hardware, you will finally add the pavers to hold everything in place and hide the plastic sheeting.

You will want to consult with a home and garden center expert if you have any questions about the specifics on setting up your wine bottle garden fountain. You may also do some research online for specific instructions as well as thumb through any fountain project literature.

Delightful Sight

Indeed, the combination of colorful wine bottles, decorative, smooth, river rock and cement pavers is a magical sight. Wine bottle garden water fountains lend themselves well to many different themed gardens. It is a definitely conversational piece as you can talk about how you were able to collect each wine bottle and how you are proud of your recycling efforts. Wine bottle spray water fountains are beautiful and eco-friendly.


Sunday, September 13, 2020

Grilling TUNA STEAKS For A Simple GOURMET MEAL


Tuna steak served in a French bistro
Tuna steak served in a French bistro (Photo credit: Wikipedia) 

Looking for a delicious and simple way to grill up that fresh tuna steak that you just caught or bought from the local seafood market? 

Grilled tuna steak  is a delightful and exciting entree for any special meal. There are various methods to spice up and flavor your catch, but today we want to talk about a popular method using wasabi powder. This unique spice is being used by many top chefs to add a special flare and flavoring to the tuna.

Assemble the following recipe ingredients:

• tuna steaks, cut to a thickness of 3/4 inch to 1 1/2 inch each ( your preference )
• 4 to 6 ounces of butter
• 1 cup of teriyaki marinade
• 1 tablespoon of wasabi powder
• 2 chopped green onions
• 1 tablespoon of olive oil, peanut oil, or vegetable oil
• salt and pepper to taste

Get started by marinating the tuna in the teriyaki marinade. Place the tuna into the marinade and completely coat both sides of the meat. Cover, place into the refrigerator and let the tuna sit and marinate for an hour or more, overnight is good too.

When ready, start up your grill and get it good and hot, but not too hot. Ideally, bring it to the same temperature as if you were grilling a regular beef steak on the grill. Then mix the wasabi powder, butter, and the green onions together and place it aside for the time being. Once the grill is to the ideal temperature and you are ready, then brush the oil onto the tuna steaks and season the meat with salt and pepper to taste. While grilling, periodically baste the tuna with the leftover teriyaki marinade. This will help to keep the tuna moist and add additional flavor. Cook until they are done to your desired temperature, then serve with the butter. You can also let some butter melt on the tuna fillets as they are cooking as well.

An alternative set of recipe ingredients and marinade flavoring:

• tuna steaks, 1-inch thick
• Sesame oil
• 1 rounded tsp. cornstarch
• 1/3 c. rice vinegar
• 1/3 c. mirin
• 1/3 c. soy sauce
• 3 tbsp. minced crystallized ginger

Popular tuna species:

Tuna is a popular, delicious, and rich tasting seafood that is prepared in many ways. It is perfect for grilling, sautee, and broiling. The flesh of tuna is pink because the tuna's muscle tissue has a higher oxygen capacity than other fish species.

• Bluefin: An important source of seafood, providing much of the tuna used in sushi. It is a particular delicacy in Japan where it has been reported that the price of a single giant tuna can exceed $100,000 on the Tokyo fish market.

• Yellowfin: found in open waters of tropical and subtropical seas worldwide, though not in the Mediterranean Sea. It has been reported to be up to 94 inches in length and 440 lb in weight. The second dorsal fin and the anal fin are both bright yellow, thus the common name, and they are very long, as are the pectoral fins. The main body is very dark metallic blue, changing to silver on the belly.

• Albacore: found in the open waters of all tropical and temperate oceans, and the Mediterranean Sea. It is a prized food and a significant fishery. Methods of fishing include rod and reel, long-line fishing, and purse seining and are highly sought after by sport fishers and recreational fishermen.

• Bigeye
• Blackfin


Sunday, September 6, 2020

Is There a Safe Way to ELIMINATE WEEDS?

English: Some weeds in my lawn Deutsch: Unbeka...
Some weeds in my lawn Photo credit: Wikipedia)
Weeds whether pretty attractive or downright ugly can be a pain in the neck. They can grow in your garden, walkways, sidewalks, and even up the side of your home if not properly removed. If you are looking for safe do it yourself solutions on how to rid yourself of weeds, you have come to the right place. Below are a few common and uncommon ways for which you can kiss those weeds goodbye.

Baking Soda

If you’re looking for a great way to keep the weeds at bay you can easily sprinkle a handful of baking soda onto the concrete areas in your yard which can include the driveways, patios, and walkways. The sodium makes it a less friendly environment for troublesome weeds like dandelions.

Bleach

Another option for getting rid of weeds found on concrete is to pour a bit of undiluted bleach over the concrete. Let the bleach sit for about a day or so and then proceed to remove them. They should remove much easier and the bleach prevents it from returning so soon.

Carpet Scraps

Did you know that a few pieces of carpet scraps turned upside down can keep your garden free from weeds? Place the carpet upside down and cover it with mulch.

Plastic Shower Curtains

Another great way to keep the weeds at bay in your garden is to utilize a shower curtain. When doing landscaping that involves gravel or bark chips all you have to do is place the shower curtain underneath the mulching materials. This prevents the weeds from poking through.

Vinegar

Another great solution for troublesome weeds poking through your driveway or patio is to try some vinegar. Using a plastic spray bottle you can easily rid yourself of weeds by spraying some full-strength apple cider or white vinegar. Early in your gardening season gently spritz your plant in the middle of the flower before the plants go to seed. Spraying more around the stem near the ground will allow the vinegar to also soak into the roots. However, this should be done on a day where there won’t be any rain for a few days after. If it does rain you will need to re-spray the plants again. 


Vodka

You probably wouldn’t have thought to look to your liquor cabinet for a safe remedy to get rid of weeds but vodka can work wonders. All you need to do is mix about one ounce of vodka with a few drops of liquid dish soap, about two cups of water into a plastic spray bottle. Generously spray it on the leaves of the weeds until the solution is dripping off. By also applying it to the weeds on a sunny day is a great way to help the alcohol break down the wax barrier found on leaves. This allows the leaves to become hydrated and thus will kill the weeds.

Last but not least on the list of easy remedies to try for getting rid of weeds is WD-40. This is great for prickly weeds such as the Russian Thistle. WD-40 will speed up the withering process and cause them to die.


Sunday, August 30, 2020

The Difference Between 'CHIANTI' Wine And 'CHIANTI CLASSICO' Wine

English: Chianti Classico Riserva fromVolpaia
Chianti Classico Riserva fromVolpaia
(Photo credit: 
Wikipedia)
Less experienced consumers tend to believe that a DOCG 'Chianti' wine and a DOCG 'Chinati Classico' wine are the same things.

Nothing more wrong than that!

Chianti Classico is a wine produced in the Chianti area. You may recognize these wines very easily by the 'black rooster' logo on the neck of the bottles.

The 'Chianti Classico Consortium' applies much stricter rules to its producers in comparison to those applied to the producers of 'Chianti'. Let us analyze these differences.

Production area: the Chianti Classico wine is produced within the borders of the namesake area only, whereas Chianti producers can implement their production also outside those borders, including some areas of the Tuscan provinces of Florence, Siena, Arezzo, Pisa, Pistoia, and Prato.

Grapes: While the Chianti Classico uses black grapes only with a minimum basis of 80% of Sangiovese (the typical grape of the Chianti's area) the Chianti wine can use also white grapes such as Malvasia and Trebbiano (in addition to the minimum basis of Sangiovese which is 75% in this case).

Quality standard: without going through the details, it is important to know that the rules of the Chianti Classico Consortium are much more rigid and strict on all the aspects which can have an impact on wine's quality. For example, the 'resa Massima di uva per ettaro di vigneto' (the maximum amount of grapes for hectare) is 75 quintals for Chianti Classico, while for Chianti the limit gets to 90 quintals.

The first version of the DOCG 'disciplinare' (production rules) for Chianti and Chianti Classico dates back to 1984 when Chianti Classico was still considered a sub-category of the Omni-comprehensive Chianti DOCG, although with separate regulations that imposed production rules more stringent than those stipulated for the other Chianti wines. Only in 1996 Chianti Classico obtained the definitive consecration of its importance and its precedence: Chianti Classico, in fact, was recognized as an independent appellation, establishing once and for all its diversity and independence of the other Chiantis.

Chianti and Chianti Classico are not the only traditional wine made in Tuscany, and sangiovese is usually the base of most red variants like Vino Nobile di Montepulciano, Morellino di Scansano, Brunello di Montalcino, Rosso di Montalcino, etc.

A black rooster was the emblem of the Lega del Chianti during the XVII century. Now 2005 the black rooster is the emblem of the Chianti Classico producers association, all Chianti Classico wines have that symbol on the neck of the bottle indicating that the wine is produced in the Classico area and according to the Chianti Classico Consortium rules.

In summary, especially in the last years, Chianti Classico Consortium's policy is to safeguard wine's quality to the detriment of quantity, mainly because of the growing number of high-quality wine all over the world. Furthermore, there is another aim which is to safeguard the quality aspects specific to the area making the Gallo Nero products unique. In that matter, on top of the Chianti Classico wine, the Vin Santo and the Olive Oil should also be mentioned.


Sunday, August 23, 2020

Choosing the BEST PLANTS for your GARDEN


Many times we buy plants on impulse then find there is nowhere in the garden that really suits them. Before buying plants carefully examine your garden to see how much sun and shade it gets, whether the soil is well drained or waterlogged and whether your aspect is sheltered or windswept. You'll then be equipped to go and buy the best plants for your situation; shade-loving plants for the sheltered areas, sun-lovers for the warm spots, drought-resistant plants for the parched areas which may be either sunny or shaded, and swamp plants for the poorly-drained parts.

But wait! Test your soil first, to determine the pH level of your soil and what kind of nutrients you need to add if any. Is the soil acid or alkaline? Most plants prefer soil that is slightly acidic, but there are some that must have alkaline soil to grow.  You can alter the soil's pH level, but it's much easier to simply plant for the soil you have.

Now you are ready to plant. Well - almost. Will you plant in groups or singly? If you buy 'one of everything' your garden may seem rather spotty. Group plantings are organized, harmonious and you can vary the color for interest.

Before planting out, place your chosen plants around the garden bed in their pots to see how they will look. Re-arrange them until you are satisfied. Grouping plants in sets of threes or fives usually looks better than planting in groups of even numbers. Be sure that you have an interesting combination of colors and textures of plants. Tall plants should go to the back, or the center if your garden will be viewed equally from all sides. Try to keep your plants away from trees. The roots of trees are fiercely competitive and will steal all the nutrients and moisture meant for your flowers.


The right color scheme is one way to maintain harmony in your garden. Imagine the color of the flowers when they are in bloom. Some colors may clash with others, but can still be planted side-by-side if they have a different blooming season. Foliage color is also important. Many flower plants have silver, grey or purplish foliage that is just as attractive as the flower. This means that they are still attractive well past the blooming season and so have added value.


Sunday, August 16, 2020

How long to cook a BEEF STEW in a CROCKPOT?

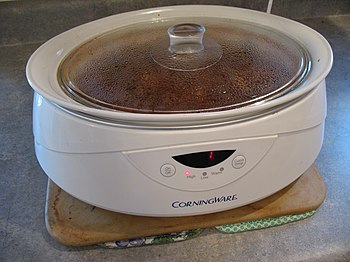
a slow cooker Oval Crock Pot
A slow cooker Oval Crock Pot (Photo credit: Wikipedia)
According to wikihow.com, “Beef stew is best cooked over low heat for a long period of time, making it a perfect candidate for crockpot cooking. Traditional beef stews are made from cuts of beef like chuck roast, but you can also make a slow-cooked beef stew using meatballs formed with ground beef. Keep reading for more information about cooking various types of beef stew in your crockpot.” 


Here are the ingredients for a traditional beef stew

2 Tbsp (30 ml) vegetable oil
2 lb (900 g) beef stew meat, cut into 1-in (2.5-cm) cubes
1/4 cup (60 ml) all-purpose flour
1/2 tsp (2.5 ml) salt
1/2 tsp (2.5 ml) ground black pepper
1 clove garlic, minced
1 bay leaf
1 tsp (5 ml) paprika
1 tsp (5 ml) Worcestershire sauce
1 onion, chopped
1 1/2 cups (375 ml) beef broth
3 potatoes, diced
4 carrots, sliced
1 celery stalk, chopped


“Heat the oil in a large skillet. Pour the oil into a large skillet and heat on the stove over medium-high heat. Meanwhile, make sure that your beef and vegetables are already prepared. The beef should be cut into 1-in (2.5-cm) cubes. You can usually find pre-cut beef stew meat in the butcher's department at the grocery store, but if not, you can trim and cut a chuck roast or bottom round cut.

The garlic clove should be minced. If using pre-minced garlic, use 1/2 tsp (2.5 ml). If using garlic powder, use 1/8 tsp (0.625 ml).

The onion and celery should be roughly chopped.
You can use 3 large baking potatoes or 6 to 9 baby potatoes.
Use 4 standard carrots or 2 cups (500 ml) baby carrots”
Here is another method from the same website, “Coat the beef with flour, salt, and pepper. Mix the flour, salt, and pepper in a large bowl. Add the beef to the mixture and toss to coat.
Make sure that the flour, salt, and pepper are thoroughly combined before adding the beef.
Stir the beef well so that all sides of each piece are covered. You should have little to no flour left once done.
Coating the beef in flour allows the beef to brown better and also makes the finished stew thicker.”

Here is the method of using a slow cooker, “Place all the beef stew ingredients in the slow cooker. Transfer the beef to the crockpot. Layer the potatoes, carrots, onion, celery, and garlic on top. Add the bay leaf, paprika, and Worcestershire sauce, then pour the beef broth over everything”


“The exact order of ingredients does not matter much, but for best results, the beef, potatoes, and carrots should make up the bottom three layers since these ingredients require the most heat to cook through. Note that the heating element of the crockpot is located on the bottom of the device.”

“Keep the crockpot covered as the stew cooks. A slow cooker needs to build up heat in order to cook properly, and the heat will be unable to build up if the lid is kept off or removed during the cooking process”